August 29, 2023
Deploying Laravel Projects on Shared cPanel Hosting
Greetings! In this comprehensive guide, we will delve into the process of deploying laravel projects onto shared cPanel hosting. Whether you're new to cPanel deployment or just need a refresher, this tutorial is designed to assist you in successfully launching your awesome Laravel 5.X project on a Shared Hosting Server.
Step 1: Preparation
-
Backup: Before you begin, make sure you have a backup of your Laravel project files and your database. This ensures you can revert to a working state if something goes wrong during the deployment process.
-
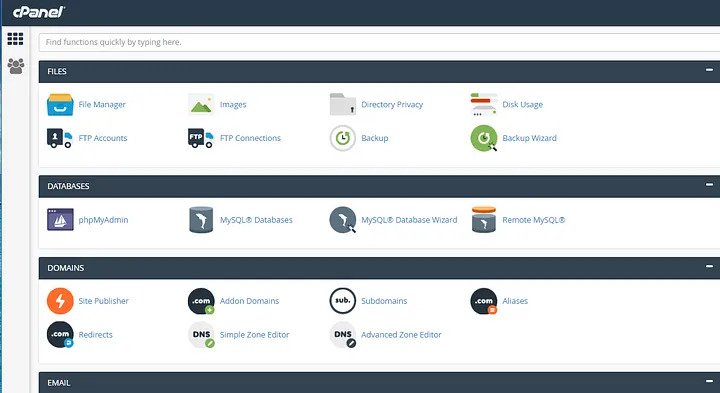
cPanel Access: Log in to your cPanel account provided by your hosting provider.
Step 2: Uploading Laravel Files
-
File Manager: In cPanel, find the "File Manager" tool and open it.
-
Create project folder: Create a new folder in your root directory. For this tutorial, I am going to name my new folder as “laravel”.
Now zip the entire Laravel project, and upload the zip into laravel folder. When the upload finishes, unzip all project files into laravel folder by selecting destination as ~/laravel/. -
Move Laravel public folder: Now go into the public folder of your Laravel project (~/laravel/public/). Look whether you can see .htaccess file. If you can’t see this .htaccess file (since Linux hides files with filenames starting from .), click on Settings (on top right corner) and on the Preferences window, enable Show Hidden Files (dotfiles) and save your selection. You now must see the dotfiles. Next, copy all the files inside this public folder (~/laravel/public/) into the public_html folder (~/public_html). Anything we store inside public_html folder can be accessed using the browser via your public domain, so make sure you do not keep any private stuff inside this public_html folder.
-
Public_html: Let’s open our public_html folder and you now must see that all the files inside our Laravel project’s public folder have properly copied into public_html folder.
-
Configure Files Paths: If everything looks good, open index.php file (~/public_html/index.php) in Code Editor. Find the following lines,
require __DIR__.’/../bootstrap/autoload.php’;
$app = require_once __DIR__.’/../bootstrap/app.php’;
Modify them by adding your project folder’s name right before the bootstrap folder name (~/laravel/bootstrap/…) as follows, to reflect the changes in the file structure.
require __DIR__.’/../laravel/bootstrap/autoload.php’;
$app = require_once __DIR__.’/../laravel/bootstrap/app.php’;
If your project has views (blade files) which do not require database access, you can now check those views on the browser.
Step 3: Setting Up the Database
-
MySQL Databases: In cPanel, find the "MySQL Databases" tool and open it.
-
Create Database: Create a new database for your Laravel project. Take note of the database name, username, and password you set up during this step.
-
Add User to Database: Assign the database user you created to the newly created database with appropriate privileges (usually "All Privileges").
Step 4: Configure .env File
-
File Manager: Go back to the "File Manager."
-
Find .env: In the root of your Laravel project files, find the
.envfile. -
Edit .env: Click on the
.envfile and choose "Edit." Update the database connection details with the database name, username, and password you set up earlier.
Step 5: Set Up Subdomain (Optional)
- Subdomains: If you want to access your Laravel project using a subdomain (e.g.,
subdomain.yourdomain.com), create a subdomain in cPanel's "Subdomains" tool that points to thepublic_htmldirectory.
Step 6: Composer Installation
-
SSH Access (Optional): If you have SSH access, you can connect to your shared hosting using SSH.
-
Composer Install: Navigate to your Laravel project's root directory using SSH and run
composer installto install the project dependencies.
Step 7: Permissions
- Storage and Bootstrap: Make sure that the
storageandbootstrap/cachedirectories are writable by the web server. You can do this by runningchmod -R 775 storage bootstrap/cachefrom your project's root directory using SSH or through cPanel's file manager.
Step 8: Set Up Web Access
- Domain Configuration: If you're using a subdomain, you can skip this step. Otherwise, ensure that your domain's DNS settings are pointing to your hosting provider's nameservers.
Step 9: Testing
- Access Your App: After completing the above steps, your Laravel app should be accessible through your domain or subdomain. Test thoroughly to ensure everything is working as expected.
Step 10: Maintenance and Updates
-
Regular Backups: Set up regular backup procedures for both your Laravel files and your database to prevent data loss.
-
Keep Laravel Updated: Stay updated with Laravel's releases and update your project regularly to benefit from bug fixes and new features.
Conclusion: Deploying a Laravel project on cPanel shared hosting requires careful configuration and attention to detail. By following these steps, you can successfully deploy your project and make it accessible to users. Remember to keep your environment secure, maintain backups, and stay updated with Laravel's best practices for a smooth running application.